I have tried photomerging
3 or 4 images into one in CS3 before but I have never tried 6. Besides, all my previous photomergings were done in a single axis i.e. either
X axis or
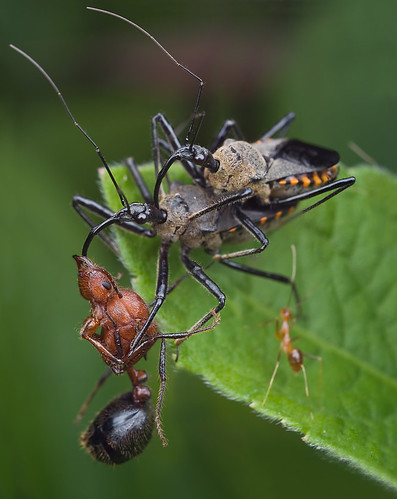
Y axis. However, just yesterday I took a 6 images of a mating pair of assassin bugs in both X and Y directions with the intention of photomerging them.
Why photomerge? At its minimum magnification of 1:1, the MPE65 can only a rectangle of 22.2mm x 14.8mm. The female assassin bug in this shot was about 15mm long. With a male on top of her and a red ant prey, there was no way I could put them all in a 22.2mm x 14.8mm rectangle field of view. I had no other 1:1 macro lens like the
Canon 100mm F2.8 L with me so shooting multiple shots for photomerging was my only option at that time.
Here is the photomerging outcome:
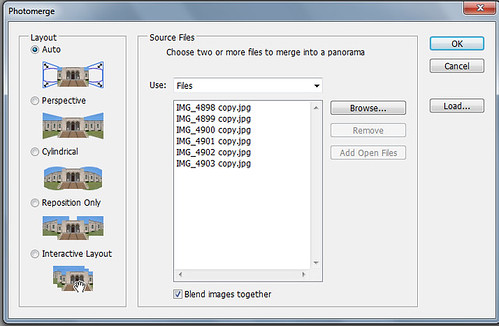
As explained in my previous
photomerging tutorial, go to File - Automate - Photomerge, then browse and select the images you want merged. The rest is automatic!
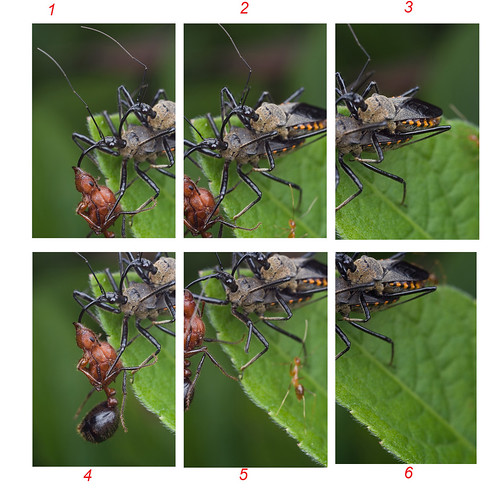
Here are the 6 separate images i used for the photomerging. I put them all into one for the ease of display and explanation. The sequence in which I took the photos is: 1, 4, 5, 2, 3. But i am sure you can go 1, 2, 3, 6, 5, 4.
The automated part by CS3 is really easy. CS3 does all the work. It may not work sometimes. In that case, you will have to merge the images manually in CS3 if you still want to merge them.
The outcome won't always be perfect so you have to inspect the merged image. Here are a few tips:
1. check/unchecked the "eyes" to see where the mergings occur and see if the merging is seamlessly done.
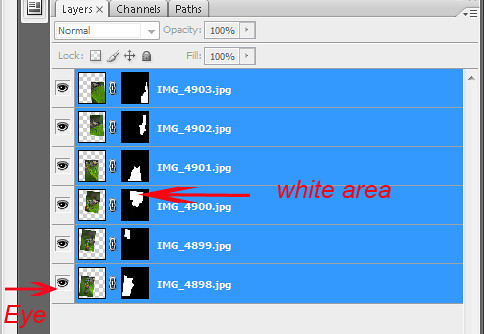
The white area in each black box indicates the portion of the image where all the details are used as opposed to discarded in black area. Each individual white piece is like a piece of the complete jigsaw puzzle. Together, they will form the merged image below.
2. This is the outcome before some cloning/repair works were done.
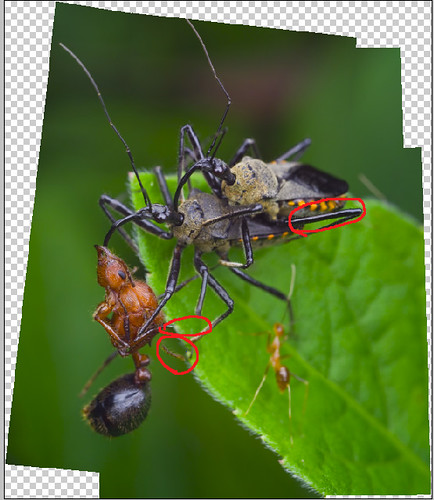
The two red circles on the red ant's legs: as you could see in image 4 and 5, the female assassin bug's left front leg has moved, and so was the red ant's legs. Yes, it's all the pervert, voyeur, little ant's fault :D. A bit of repair work was needed. I opened up Image #4 and paste it onto the Merged Image, then reduce the opacity to 50% and align the two images as accurately as I could by zooming in to at least 100%, then adjust the opacity back to 100%, then layer mask, and brush tool - exactly similar to how you would do manual focus stacking as elaborated in
Manual focus stack for more DOF in CS3.
3. Sweet, we are almost done. Only one more red circle to take care of. That's the one on the male assassin bug's left hind leg. You probably can't see it clearly but I could in the full size image. It was too sharp, too "in-focus" when that area should be slightly out of focus! I used the "Blur" tool to blur out that area.
4. Crop the image and clone in the missing part of the leaf in bottom right corner and clone in the background around all the four edges.
5. Done.